Most people can describe the first step of a custom cabinetry project and the last one. Someone comes to the house and measures. Some weeks later a van pulls up and things get carried inside. The part in between is usually a fog, which is a shame, because the fog is exactly where projects quietly go right or wrong.
So here is the middle, stage by stage: what happens, what we need from you, and where the delays honestly come from. It describes the way we work, but most of it applies to any builder worth hiring.
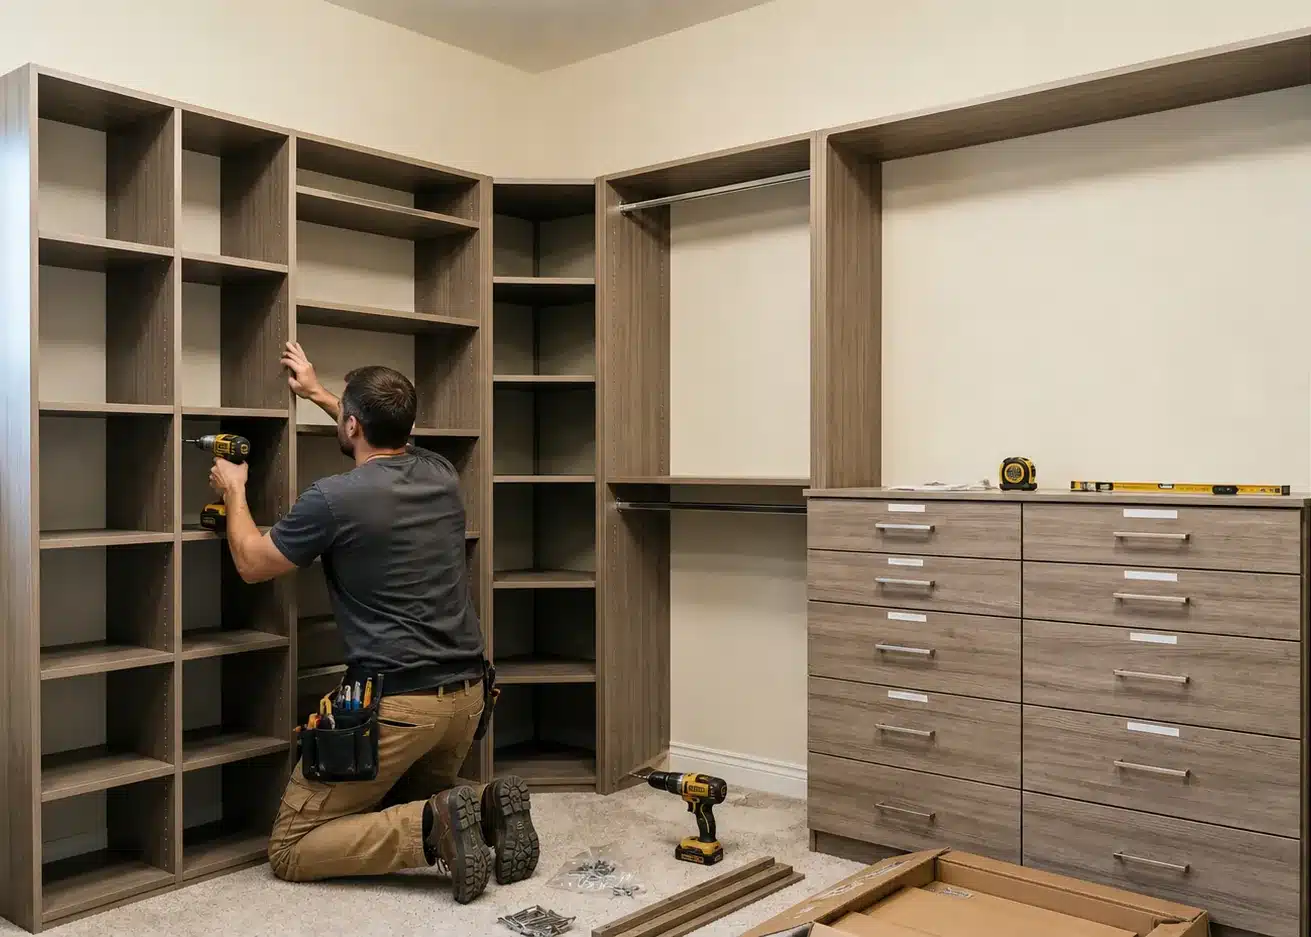
Install day. By the time a driver goes into a panel, five earlier stages have already decided how well this goes.
Stage One, the Appointment in Your Home
A designer comes to you with the finish samples, because a laminate under showroom lighting and the same laminate next to your floor at four in the afternoon are two different colours. For a closet it runs about ninety minutes. Kitchens get two appointments of about ninety minutes each, since there is more to settle: the first covers the design and how you actually use the room, and the second walks through the finalized design with full pricing.
The conversation is the visible half. The other half is a list of numbers and notes that nobody talks about afterward but everybody depends on:
- Where the walls aren’t square. Almost no closet is a true rectangle. A wall that runs out by half an inch over eight feet changes how a run of cabinetry has to be built.
- Baseboard thickness and profile. Cabinetry either sits proud of the baseboard, gets a moulding to close the gap behind it, or the baseboard comes off in that section. That decision is made now, not on install day.
- Vents, registers, outlets and switches. A cold air return behind a drawer bank is a problem you want found in week one.
- Ceiling variation. Ceilings dip. A tower cut to the height at the left corner won’t fit at the right corner, so we take the height in several places.
- Which way the doors swing, including any door that has to clear an open drawer front.
What you should do: clear enough of the room that the walls are reachable, and know roughly what you own. Hanging inventory in feet, how many drawers you actually want, who else uses the space. Decisions made from a real wardrobe beat decisions made from a guess.
Stage Two, Design and the Revision Loop
You get a drawing. The shop will eventually build from that drawing, so read it like a contract rather than like a picture. Check the drawer count, check hanging heights against the longest thing you own, check that the section you assumed was shelving is shelving.
Then you change things, which is normal and expected. Revisions at the drawing stage take nothing but a bit of time, and this is by far the easiest moment in the whole project to change your mind. If something is nagging at you, say it now. The tidy full breakdown lives on our step-by-step custom cabinetry design and build process page if you want to see the whole arc at once.
What you should do: get every decision-maker to look at the drawing together, once, and give one consolidated set of changes. Two rounds of separate opinions is where a week disappears.
Stage Three, Approval and the Handoff to the Shop
Nobody has to approve a job off a flat drawing. You’re welcome to see it in three dimensions first, and most of our designers build the model on the spot in your house, so you watch the room come together on the screen while you’re still standing in it. You also get a finalized rendering to look at before anything is built. All of that happens before you’ve bought a thing.
When you approve, something real changes. The design stops being a conversation and becomes a cut list, and that cut list goes into production scheduling at the Barrie workshop. Every panel gets a size, every edge gets a finish direction, every hinge and slide gets a position.
This is the hinge the whole timeline turns on. Before approval, a change is a redraw. After it, a change means parts already cut are now the wrong size.
Stage Four, the Check-Measure
Before anything is cut, the space gets measured again. People sometimes read this as a sign the first measurement was sloppy, and it isn’t. The first measurement is for designing. The second is for cutting, and between the two, things move.
New flooring goes in and the floor height changes. Baseboards get replaced with a thicker profile. Somebody adds an outlet. On a new build, the room simply wasn’t finished the first time. A check-measure catches all of it while the fix is still a keystroke instead of a scrap panel.
It isn’t every job. Check-measures are standard above about $10,000, and past that it depends on the space. A run with a free end can absorb a small variation. Anything wall-to-wall can’t, so wall-to-wall always gets measured again, and so do the doors and drawer fronts on it, because those come from a third-party supplier and there is no trimming them in your hallway. The installer measures once more before he starts, which is the last chance anything has to be caught.
What you should do: tell us about any other trade booked between now and install. Painters, flooring, electrical. If drywall is going to change, we would much rather cut after it.
Stage Five, Cutting and Edge-Banding
Panels are cut from 3/4″ thermally fused laminate, the thickness commercial specifications generally require, and every exposed edge gets banded so the panel is sealed rather than raw. Holes get bored for shelf pins, hinges and drawer slides. Everything is labelled by room and by position, because a stack of finished panels all looks the same on a truck.
None of it is glamorous, which is rather the point. This whole stage runs on the numbers from the check-measure.

Parts arrive as components and become cabinetry in the room. The numbers they were cut to came from your walls, not from a catalogue.
Stage Six, Delivery Day
Components come in flat and stacked, not as finished cabinetry, and they need somewhere to live for a few hours. A garage is the usual answer, or a spare room, or the far end of the room being worked in. Floors get protected on the path from the door to the room.
What you should do: clear the path and clear the room, properly. Empty the closet completely, including the shelf above the rod that everyone forgets. Park a car outside if the garage is the staging area, and decide in advance where the dog is going to be while a door is propped open.
Stage Seven, Install Day
Our installers are our own employees rather than subcontractors, so the crew in your house works for the company that made the cabinetry and stands behind the warranty. Here is what they are actually doing.
1. Levelling on a floor that isn’t level
No floor is flat. The cabinets stand on levelling feet, wound up or down until every box is square and the tops of adjacent runs line up, because a drawer front that’s out by an eighth is visible from across the room.
2. Closing the gap where a wall isn’t straight
No wall is flat, so where cabinetry meets one there’s a gap that opens and closes along its length. We close it with scribe moulding or base moulding cut to follow the wall, rather than cutting the panel itself. Cutting the panel is the fussier method and it carries a real risk: get it wrong and the panel is scrap and the job waits on a replacement. A moulding settles it the same way to the eye, and it can be fitted on the day.
3. Toe kicks and trim
Floor-based cabinetry finishes at the floor the way kitchen cabinetry does. The toe kick goes on last and is scribed to the floor’s real line, which is what hides the gap those levelling feet just created, and trim closes the joint where millwork meets wall and ceiling.
4. Hardware, doors and drawers
Hinges and slides get adjusted so gaps between doors are even and drawers close the same way each time. This is fiddly and slow, and it is most of what separates a good install from a fast one.
Stage Eight, the Walkthrough
At the end, you walk the finished job with the installer and open everything. Pull every drawer, swing every door, push on a shelf. Anything that isn’t right goes on a deficiency list then and there: a scuff, a slightly proud door, a piece of trim you’d like tighter.
Nobody should feel awkward about a deficiency list, because it’s simply how millwork gets finished properly. Say the small things out loud, because the small thing you politely ignore on the day is the one that irritates you for a decade. Once the list is closed out, the work is covered by the Homeowners Lifetime Warranty that comes with every project we build.
He also cleans up before he goes. There’s a handheld vacuum in the van, and the standard he works to is that the room is usable the moment he’s out of it: offcuts and packaging away, drill dust off the shelves, floor vacuumed. Finishing his tidying after he’s driven off isn’t part of the deal.
What Actually Slows Projects Down
Changing your mind, mostly, and it’s worth being blunt about the mechanics. We cut about a week before installation. Up to that point a change costs you nothing and we would far rather have it. Once the saw has run, the same change means buying the material a second time, and it can move your install date. Custom colours take that hardest, because they are ordered in rather than pulled off a rack.
Which is really a fact about how the shop runs. We manufacture just in time instead of holding a warehouse of stock, and we carry enough material to service the work already sold, not much beyond it. Recutting a panel isn’t a walk to the rack. It’s an order for new sheets. That is also why we push so hard to have every decision settled back at the drawing stage, where changing your mind costs a designer an afternoon and nothing else.
After that it’s access: a room that isn’t emptied, a condo elevator that needed booking a week ago, a locked gate. Not dramatic, and avoidable with a phone call.
Book the First Stage
Everything above starts with one appointment. A designer comes to your home with the samples so you can see the finishes in your own lighting and next to your own floors, and takes about ninety minutes to work through the layout with you. Kitchen projects get two ninety-minute appointments, the first for design and the second for the finalized plan with full pricing. Whatever you build, from custom closet systems we build across Ontario to a full kitchen, it’s made in our Barrie workshop, installed by our own employees rather than subcontractors, and covered by the Homeowners Lifetime Warranty. Book your in-home design appointment and we’ll start with your walls.